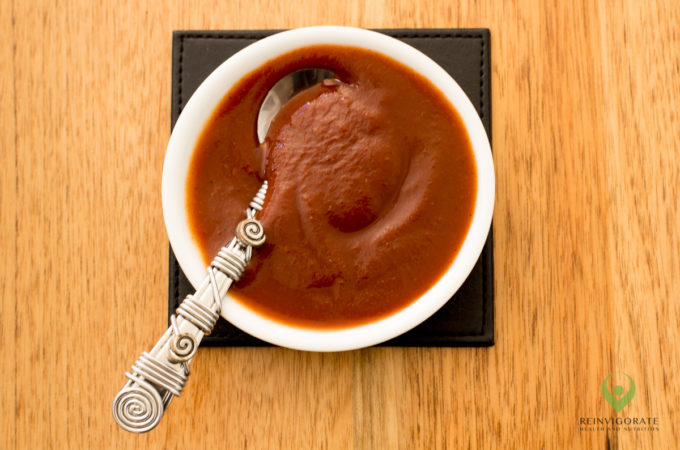
Last week, my friend Steve came over for dinner. Steve and I go back a long way. He's one of my dearest friends. It doesn't matter how long it is since I last saw him, it always seems like it was just yesterday. He's what I'd call a "kindred spirit".
I made Steve lamb shanks — wonderful winter comfort food. (I'll post a recipe when I make it again and get a decent chance to photograph it. Sometimes photographing food just interrupts the flow. :-) ) When Steve arrived, almost everything was ready and there were just a few finishing touches to be made. He watched me bustle about, finishing things off, for maybe a minute — then he cracked up laughing.
I looked askance at him and he said, between bursts of laughter, "Do you remember when I used to visit you in Bullsbrook, and [your ex] was making dinner and would describe to me what he was cooking, and your eyes would just glaze over…?"
Hrmph. :-)
But it's true. It's only since my marriage break-up 3½ years ago that I've showed any real interest in food and cooking myself, and it was a while after that before I became aware of the Slow Food movement and all it stands for. I am still very much learning as I go along, so it's kinda sweet that Steve noticed the difference between then and now. (And is still alive to tell the tale!)
It's about people
Over the weekend I installed the free Australian Gourmet Traveller iPad app and purchased the (thus far) three available magazine issues. I had subscribed to the print mag for a while but had let the subscription lapse in the last few months. Getting the iPad app seemed like a worthwhile experiment, to see if the magazine worked better for me on the iPad than in print…
It definitely does. I now want all my foodie magazines like that. I really do! It's so well done. I'm so impressed! But that's another story and I digress. More to the point, I was reading a comment in the June 2010 issue by Eamon Sullivan, Olympic swimmer and Celebrity MasterChef. He said:
If people respond well to your food, it makes you feel good. That's the sort of thing you get addicted to: pleasing people through food.
That so aptly describes where I'm coming from. Living alone, I find there is little pleasure in cooking just for myself. The food may taste good but the experience is somewhat lacking.
So I've become aware of just how much, when I cook, it's for other people. Enjoyment of food is inseparable from the enjoyment that others get from the food, and the pleasure of spending time with them. The terms "cooking from the heart" and "cooking with love" sound so corny and almost ridiculous in this cynical day and age, but that really is what it's about for me and for many people. When that's the case, I believe it shows — not just in the food, but in the total experience of eating with the folks you cooked for, and perhaps also with.
This is why, of course, in the absence of a live-in guinea pig, I like to invite others over for meals. And that doesn't seem like a bad thing, as addictions go. :-)
Posted by Vicki on Monday, August 02, 2010 at 10:58 AM in
General and
Slow Food.
Comments (1) •
Permalink
This recipe is for a tasty but low-key meal that is quick, simple and cheap — perfect for those times when you want to eat well but just don't feel like going to a lot of trouble. It's also low-fat, which is always nice and all too rare in a pasta dish.
The anchovies give it a (necessary) depth of flavour, but they dissolve into anonymity and overall flavours of the dish are balanced, so even fussy kids will enjoy it.
Serve with a simple green salad.
Lamb, Feta and Herb Pasta

A simple, budget-friendly and kid-friendly weeknight meal.
Serves 4
Ingredients
- 400 g tortiglioni or penne pasta
- 1 tablespoon olive oil
- 1 small onion, finely chopped
- 2 cloves garlic, crushed
- 4-5 anchovies, drained, chopped
- 500 g lamb mince
- 2 tablespoons lemon juice
- 3 vine-ripened tomatoes, chopped
- ½ cup feta cheese, crumbled
- ¼ cup mint leaves, chopped
- ½ cup flat-leaf parsley leaves, chopped
Directions
- Cook pasta following packet directions.
- Meanwhile, heat oil in a frying pan over medium heat. Add onion and cook for 3 to 4 minutes. Add garlic and anchovies. Cook for 1 minute or until anchovies dissolve.
- Increase heat to medium-high. Add mince and cook, stirring with a wooden spoon, for 3 minutes or until mince is browned. Add lemon juice, tomatoes and salt and pepper. Cook for 4 to 5 minutes or until tomatoes soften. Remove from heat.
- Drain pasta and return to pan. Add mince mixture, feta, mint and parsley. Toss.
- Season with salt and pepper and serve.
Posted by Vicki on Sunday, June 20, 2010 at 04:18 PM in
Recipes and
Lamb and
Low-fat and
Pasta.
Comments (1) •
Permalink
Tonight's meal was Attempt No.3 at making Szechuan Chicken. Finally, I have achieved a result I'd be happy to repeat.
I've long been a fan of Szechuan Chicken, however it's not easy to find a decent version in Asian restaurants around about town. Quite possibly I just go to the wrong ones, but I suspect much "Chinese" food here is Anglicised well beyond the point of being authentic, even at a stretch.
Actually, I have no idea how authentic this recipe is, never having been to China let alone the Sichuan province. But I like it. There's a pleasing balance of flavours without it being overly sweet and saucy like so many restaurant "Szechuan Chicken" dishes I've tried — but in the end it's all about what you enjoy, so experiment with it, as I have done. As always, taste as you cook, because the amounts below should only be considered guides.
This is actually quite a mild dish if the chillies are left whole — as long as you refrain from putting a whole chilli in your mouth, that is! For more of a bite (which I confess, I personally enjoy) chop the chillies after soaking them. This means the chilli will not only be spread more evenly throughout the dish, but the hotness of the seeds will be released throughout, too. But go easy — you may wish to reduce the number of chillies if you take this path.
Szechuan Chicken with Cashew Nuts

A delicious blend of colour, texture and flavour.
Serves 4
Ingredients
- 1 tablespoon cornflour
- 1 egg white, beaten lightly
- 450 g chicken thigh fillet, cut into 2cm pieces
- 2 tablespoons peanut oil
- 1 large handful raw, unsalted cashew nuts
- 2 spring onions, sliced into 4cm pieces
- 4 whole dried chillies, soaked in water for 10 minutes (and chopped, if a hotter result is desired)
- ½ green capsicum, cored, seeded and cut into 2cm pieces (optional — I wanted more green, and it complemented the dish nicely, but isn't essential. Again, whatever works for you.)
- 2.5 cm ginger, peeled and chopped
- 1 clove garlic, finely sliced (optional)
- 2 tablespoons sweet bean paste or hoisin sauce
- 2 teaspoons chilli bean paste
- 2 tablespoons shaoxing wine
- a small drizzle of sesame oil
- steamed rice, to serve
Directions
- Coat chicken pieces in flour, shaking off excess, then mix together with the egg white until evenly coated. Refrigerate for 30 minutes. If you haven't already done so, use this time to prepare the other ingredients.
- Heat a wok to medium, add the peanut oil, and stir-fry the cashew nuts until golden all over. Careful not to get the wok and oil too hot or your nuts will burn. When they're ready, remove from the wok with a slotted spoon into a bowl lined with kitchen paper to absorb any excess oil.
- Reheat the oil in the wok to very high. Add half the chilled chicken and stir-fry until golden. Repeat with the remaining chicken, then remove with a slotted spoon into a bowl lined with kitchen paper to absorb any excess oil.
- Add the capsicum, chilli, spring onion, ginger and garlic (if using) and stir-fry for about a minute.
- Return the chicken to the wok with the sauces, and stir-fry until re-heated.
- Serve with steamed rice.
Posted by Vicki on Thursday, June 10, 2010 at 09:02 PM in
Recipes and
Asian and
Chicken and
Stir-fry.
Comments (4) •
Permalink
This was one of the first dishes from the CSIRO Total Wellbeing Diet (Book 2) that we tried when we started dieting back in January. The diet fell by the wayside a while ago but we have, this past week, revived it. Our plan for dinner tonight is to have leftover lamb curry with rice, raita and fresh tomato chutney — which you'll agree is lacking somewhat in the vegie department. So, I thought, to make up for such laxness, a brunch of Bacon, Egg and Mushroom Bake would be perfect to balance it out, being quite high in protein and low in carbohydrates, with lots of veg in the form of a green salad.
It takes a bit of time to prepare and cook, so this is great for a leisurely Sunday morning.
Bacon, Egg and Mushroom Bake

Low-fat but filling, "Bacon, Egg and Mushroom Bake" makes a perfect brunch for a relaxed Sunday morning.
Serves 2
Ingredients
- 1 teaspoon olive oil
- ½ red onion, sliced
- 1 rasher of bacon, trimmed of fat, sliced
- 1 large flat mushroom, sliced
- 3 eggs
- 100 g low-fat natural yoghurt
- 1½ teaspoons mustard powder
- 35 g cheddar cheese, grated
- 1 heaped tablespoon roughly chopped flat-leaf parsley
- 1 ripe tomato, sliced
Directions
- Preheat oven to 170ºC. Lightly grease 2 small (or 1 medium) shallow ovenproof dishes. I used 350ml individual casserole dishes and they were just right.
- Heat oil in a medium non-stick frying pan over medium heat. Add onion and bacon and cook for 5 minutes, or until onion is soft. Add mushrooms and cook for a further 2 minutes.
- Remove from heat and allow to cool.
- In a bowl, lightly whisk together eggs, yoghurt and mustard powder.
- Add cheese and parsley, and stir to combine.
- Spoon half of the mushroom mix into each of the prepared dishes, then pour over the egg mixture. Arrange slices of tomato on top.
- Bake for 25-30 minutes, or until the top is golden and the contents are firm. (One combined bake will need longer.)
- Serve with a large green salad.
Notes
For a bit of flavour variation, try adding some herbs. Thyme, oregano or basil would all work well with this.
Posted by Vicki on Sunday, June 06, 2010 at 01:44 PM in
Recipes and
Breakfast and
Low-fat.
Comments (0) •
Permalink
I've been having lots of fun this last month or so with my new wok. I've tried several Asian recipes, experimenting with flavours. I've tried some recipes more than once, trying to get them just right (as ya do). I'm sure you too know what it's like when you try to make a dish for the first time, and you eat it and think, "That was yummy but next time I'll..." I've been doing a lot of that in the last few weeks!
One of the first meals I made in the wok was a Kylie Kwong recipe for Mongolian Beef. It was delicious made just as the recipe directs, though I do confess I substituted shredded rump steak for Kylie's recommended beef mince. (And don't forget to taste as you cook, to ensure you have a nice balance of flavours!)
This is a quick and simple family meal that's both tasty and healthy. It doesn't even have to be hot (as in chillies) at all if you leave off the suggested chilli garnish.
Mongolian Beef

Mongolian Beef
Serves 4
Ingredients
- For the marinade
- 2 tablespoons rice wine
- 1 tablespoon light soy sauce
- 1 tablespoon cornflour
- 1 tablespoon ginger, finely diced
- 3 cloves garlic, finely diced
- ½ teaspoon sesame oil
- For the beef
- 600 g rump steak, shredded
- 1 head chinese cabbage, finely shredded
- 2 teaspoons sea salt
- 50 ml vegetable oil
- 2 tablespoons rice wine
- 2 tablespoons hoisin sauce
- 1 tablespoon oyster sauce
- 1 teaspoon malt vinegar
- ½ teaspoon sesame oil
- 1 small carrot, peeled and finely sliced
- 1 small red pepper, finely sliced
- 1 bunch spring onions, finely sliced
- To serve
- steamed rice
- sliced chillies
Directions
- Combine all of the marinade ingredients in a large bowl.
- Add in the beef and leave to marinate in fridge for 30 minutes.
- Put the cabbage and salt into another bowl and mix well to combine. Leave to stand for 15 minutes then rinse under cold water and drain. Squeeze out any excess liquid with your hands.
- Heat 2 tablespoons of the oil in a wok until the surface starts to shimmer slightly. Add half of the marinated beef and stir fry for 30 seconds. Remove from the wok with a slotted spoon and set to one side.
- Add the remaining oil to the wok and cook the remaining beef for 30 seconds before returning the reserved beef to the pan.
- Add in the rice wine, hoisin and oyster sauce, vinegar and sesame oil and cook for a further 30 seconds.
- Toss in the cabbage, carrot and pepper and stir-fry for a further minute.
- Stir through the spring onions, reserving a few for garnish and remove from the heat.
- Spoon the beef into a serving bowl, sprinkle with remaining spring onions and serve with rice and sliced chillies.
Posted by Vicki on Friday, June 04, 2010 at 06:54 PM in
Recipes and
Asian and
Beef and
Low-fat and
Stir-fry.
Comments (0) •
Permalink
My new wok arrived yesterday! Yay! I do love getting new kitchen toys.
Naturally, the wok had to be "christened" that very day. It's made of carbon steel so it first had to be seasoned — a baptism of fire indeed and so exciting to see the grey metal change colour to a beautiful shiny black. After that, it was ready to be put to use.
The recipe I eventually decided on was a Neil Perry one: Szechuan Beef. I settled on this one because, firstly, I figured anything Neil Perry put his name to was bound to be worth eating, and also because it looked simple to make and I had most of the ingredients already.
The result was extremely tasty. Beautifully balanced flavours and mildly spicy, with a crunch to the beef that was unusual (to me) but pleasing. I loved the shredded carrot and celery with it too; the absence of chunky pieces ensures that the balance of flavour and texture is maintained in every mouthful.
Crunchy Szechuan Beef

Crunchy Szechuan Beef
Serves 2, or 4 as part of an Asian-style banquet
Ingredients
- Vegetable oil, for cooking
- 450 g beef fillet, shredded
- ½ tablespoon hot bean paste
- ½ tablespoon ginger, chopped
- ½ tablespoon spring onions, chopped
- ½ cup shredded carrot
- ½ cup shredded celery
- 1 tablespoon light soy sauce
- ½ tablespoon shaoxing wine
- ½ tablespoon caster sugar
- Dash sesame oil
- ¼ teaspoon Szechuan peppercorns, roasted and ground
- spring onion, extra, to garnish
Directions
- Heat a wok and add vegetable oil. Deep fry the beef about 6 minutes, until crispy, then remove from the wok and drain.
- Reheat the wok and add ½ tablespoon oil. Stir fry the ginger and spring onion until fragrant, then add the hot bean paste, carrot and celery and toss well.
- Return the beef to the wok with the shaoxing, soy, sugar, sesame oil and Szechuan pepper. Stir fry 1 minute and finish with a little extra spring onion.
- Serve with steamed jasmine rice.
Posted by Vicki on Thursday, April 29, 2010 at 04:11 PM in
Recipes and
Asian and
Beef and
Stir-fry.
Comments (1) •
Permalink
ANZAC Day, April 25, is an important day for Australians. From the time we are tots we are taught to remember and honour Australian servicemen and women, and especially those tens of thousands of the Australia and New Zealand Army Corps who fought and died in an ill-fated push against the Turks in World War 1. The ANZACS landed at Gallipoli, Turkey, on April 25, 1915, and were slaughtered over the next several months.
ANZAC Biscuits were given their name because — as they keep very well — they were sent overseas to those serving in the War. My son and I made some today. They are crispy on the outside and slightly soft and chewy on the inside and very yummy.
Lest we forget.
ANZAC Biscuits

Fresh out of the oven.
Serves ... makes about 24
Ingredients
- 1 cup plain flour
- 1 cup rolled oats
- 1 cup brown sugar (you can use caster sugar, but be prepared for the resulting biscuit to be lighter in colour)
- ½ cup desiccated coconut
- 125 g butter
- 3 tablespoons golden syrup (or treacle if you don't have golden syrup)
- 1 tablespoon water
- ½ teaspoon bicarbonate of soda
Directions
- Sift the flour into a bowl. Add the sugar, rolled oats and coconut.
- Melt the butter in a saucepan (or cut it roughly into chunks and microwave gently for about 40 seconds, then wait a minute or two for the whole lot to completely melt) then add the golden syrup and water.
- Stir the bicarbonate of soda into the liquid mixture.
- Add the liquid to the dry ingredients and mix thoroughly.
- Place walnut-sized balls of mixture on a greased tray. Allow plenty of room between each as they do spread a lot.
- Bake at 175°C until they are lovely and golden (about 15 minutes).
Notes
Don't worry if the biscuits seem soggy when you take them out of the oven — they'll harden as they cool.
Posted by Vicki on Sunday, April 25, 2010 at 02:38 PM in
Recipes and
Baking.
Comments (0) •
Permalink
This simple meal is bursting with flavour. The sweetness of the roast pumpkin is just gorgeous and it goes soooooooo well in a salad with spinach leaves, feta and toasted pine nuts. It is further enhanced by the dressing of balsamic vinegar, olive oil and garlic. It's a delicious combination that beautifully complements the natural flavour of the lamb.
You can start preparing this meal a bit ahead of time. When we had this a night or two ago, I prepared and roasted the pumpkin a couple of hours before dinner time. While the yummy, golden little wedges were roasting, I toasted the pine nuts (you can buy them already toasted but I love them when they are freshly toasted, which only takes a couple of minutes) and also prepared the other salad ingredients and the dressing. I then went to sit down for an hour or so until it was dinner time, and when it was time to eat all I really had to do was cook the lamb and let it rest before serving.
The original recipe uses a lot more salt and pepper than I did. I really don't think food needs to be swamped with salt and pepper, and the dressing here is already salty from the balsamic vinegar so I've omitted it from the dressing. I also took it very easy with the seasoning on the pumpkin and lamb — we only want just enough seasoning here to enhance the natural flavours.
Lamb with Roast Pumpkin Salad

Lamb with Roast Pumpkin Salad
Serves 2
Ingredients
- olive oil cooking spray
- 6 lean lamb cutlets
- Roast Pumpkin Salad
- 600 g butternut pumpkin, peeled, deseeded, cut into thin wedges
- 50 g baby spinach leaves
- 2 tablespoon pine nuts, toasted*
- 100 g feta cheese, cut into small cubes (I used Danish feta — I just love its creaminess — but use your own favourite or even a reduced-fat version)
- Dressing
- 4 teaspoons balsamic vinegar
- 4 teaspoons extra virgin olive oil
- 2 cloves garlic, crushed
Directions
- Preheat oven to 230°C.
- Line a baking dish with baking paper. Place pumpkin in a single layer in baking dish. Spray with oil. Season with a little salt and pepper. Turn pumpkin. Repeat with oil and salt and pepper.
- Roast for 20 minutes, turning once, until tender.
- Preheat a barbecue grill or chargrill on medium-high heat. Spray both sides of lamb with oil. Season with a little salt and pepper. Cook for 2 minutes each side for medium or until cooked to your liking.
- Transfer to a plate. Cover loosely with foil. Stand for 5 minutes.
- Place spinach, pine nuts and feta in a bowl. Toss to combine.
- Whisk vinegar, oil and garlic in a jug. Add to salad with pumpkin. Toss gently to combine.
- Serve lamb with roast pumpkin salad.
Notes
The dressing is quite garlicky, so if you have to breathe on anyone later, you may want to tone down the garlic a bit!
*To toast pine nuts, heat a dry skillet on medium-low. Add the pine-nuts and shake and stir for a minute or two, until the nuts are lovely and golden all over and smell and taste divine. (Yep I always taste — I can't help myself!) Remove them from the pan immediately they're done to your satisfaction, as they will continue to brown for as long as they are in contact with the hot pan.
Posted by Vicki on Friday, April 23, 2010 at 11:18 AM in
Recipes and
Lamb and
Low-fat.
Comments (0) •
Permalink